Building a Real-Time Chat Application with WebSocket
Introduction
In today’s fast-paced digital world, real-time communication is essential for various applications, from chat systems to live updates, multiplayer online gaming and live score updates. An effective way for clients and servers to communicate in real time and both ways is with WebSockets.By following this blog post's instructions, you may use WebSocket to create a real-time chat application.
Table of Contents
- Understanding WebSocket
- What is WebSocket?
- How does WebSocket differ from HTTP?
- System Design of Chat Application
- Setting Up the WebSocket Server
- Installing the required packages
- Creating a basic Node.js server
- Integrating the WebSocket library
- Developing the Client-Side Application
- Creating the HTML structure
- Establishing a WebSocket connection
- Handling incoming and outgoing messages
- Managing Connections and Messages
- Handling multiple client connections
- Broadcasting messages to all connected clients
- Implementing Error Handling and Debugging
- Adding logs for better traceability
- Handling connection errors and disconnections gracefully
- Enhancing the User Experience
- Updating the chat interface in real-time
- Adding user-friendly features
- Conclusion
1. Understanding WebSocket
What is WebSocket?
A protocol called WebSocket allows two-way communication over an extended period of time between a client and a server. WebSocket is perfect for real-time applications because it enables for continuous data exchange, unlike HTTP, which is based on request-response. Here The client initiates a WebSocket connection through a process known as the WebSocket handshake.The client and server maintain a continuous connection, and either party can start delivering data at any time.
What is WebSocket Handshake?
The process of initiating a WebSocket connection between a client and a server is known as the WebSocket handshake. The first step in this handshake process is for the client to send the server an HTTP request, which, if accepted by the server, is upgraded to a WebSocket connection.
Below code snippet depicts how to open the websocket connection from client side.

Above code just initiates the process of connecting to ![]() over a WebSocket.
over a WebSocket.
The ws scheme is used in WebSocket URLs. For secure WebSocket connections, which are comparable to HTTPS, there is also wss.
Client Request : This request includes the Upgrade header indicating the desire to switch to the WebSocket protocol.
Example for sample request:

Server Response: The server examines the request headers to determine if it supports the WebSocket protocol. If the server agrees, it sends back a response confirming the upgrade.
Example for sample response:

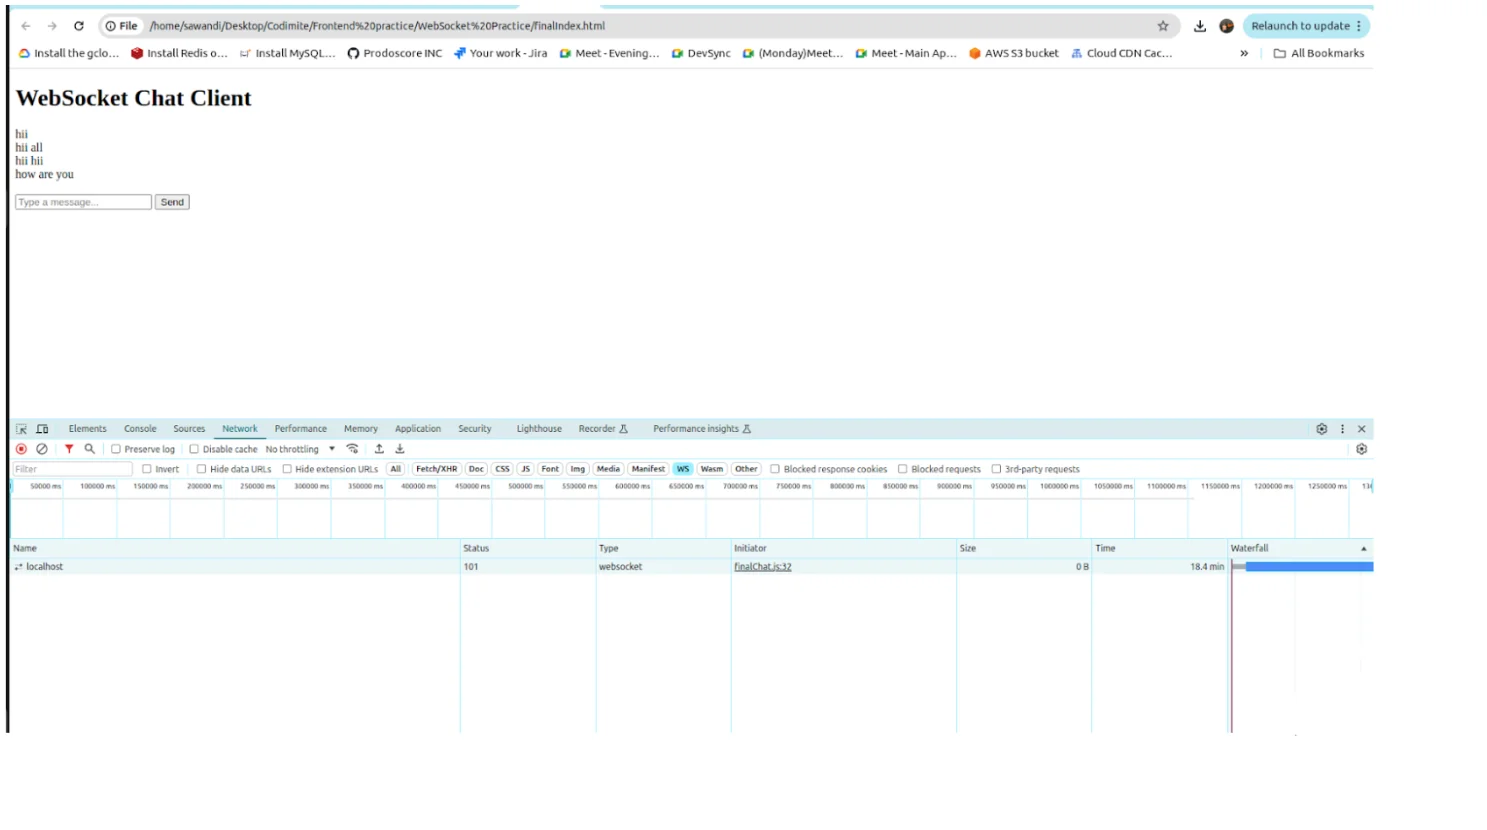
The status code 101 - It indicates that the WebSocket handshake has successfully upgraded the HTTP connection to a WebSocket connection.
You can See the established WebSocket connection using the Network Tab inside Chrome DevTools:
How is WebSocket different from HTTP?
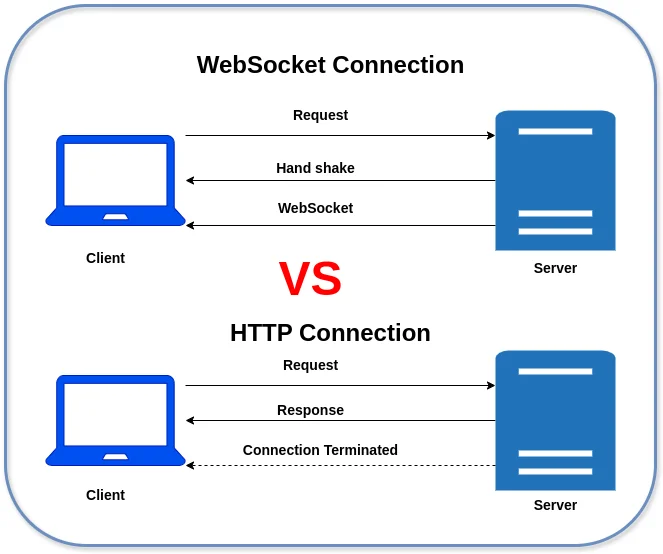
- HTTP is stateless (unidirectional) and requires a new connection for each request/response cycle,
- WebSocket maintains a persistent connection (stateful - bidirectional), allowing for instant data transfer without the overhead of HTTP requests.
Let’s see how to create a simple real time chat application using websocket connection.
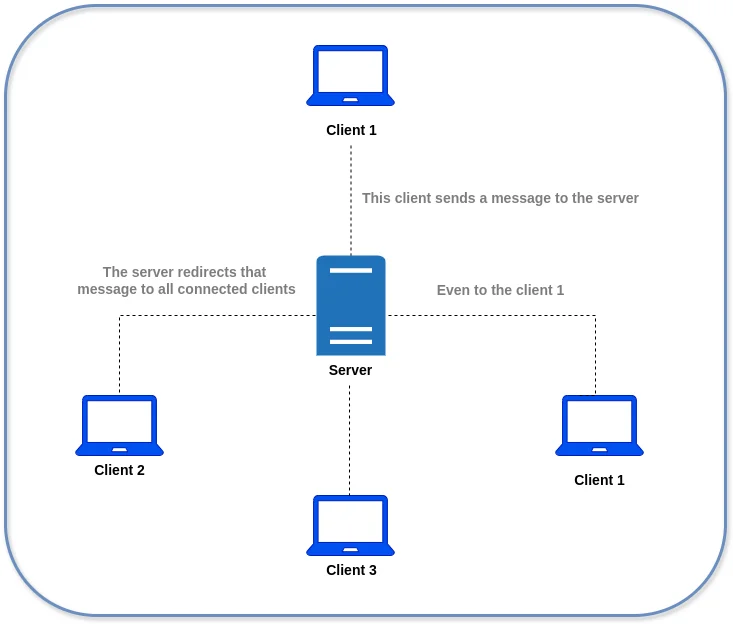
2. System Design of Real time chat application- WebSockets enable bi-directional communication between the server and the client.
- When it comes to sending out continuous message requests, this is more effective than using standard HTTP queries.
- With the help of a WebSocket Server, the server can transmit data to the client directly and does not require a request.
3. Setting Up the WebSocket Server
First install the required packages
To get started, you need to install Node.js and the websocket library. Run the following commands:
npm init -y : To simplifies setting up a Node.js project by creating a package.json file with default values.
npm install websocket: To install the websocket library.
Then create a basic Node.js server
Create a server.js file and set up a basic HTTP server:

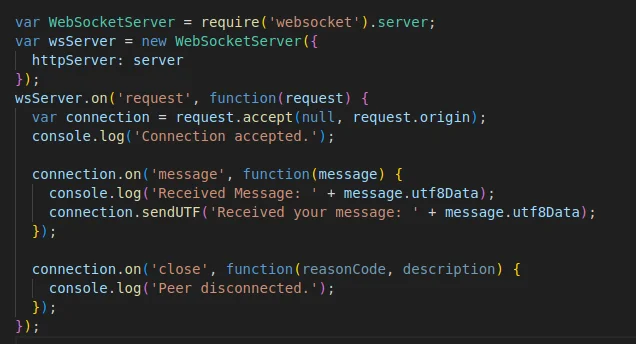
Then Integrate the WebSocket library
Add the WebSocket server to handle WebSocket connections:
4. Developing the Client-Side Application
First create the HTML structure
Create an index.html file with the following basic content:

Then establishing a WebSocket connection
Create a chat.js file to manage WebSocket connections:
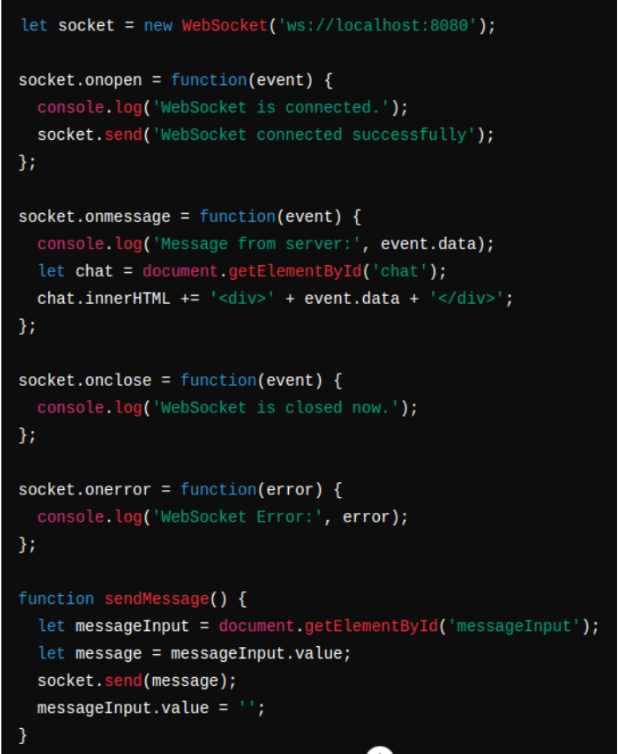
- The open event will be triggered on the client side of your WebSocket instance after the connection has been established:

- The original HTTP connection is now replaced by a WebSocket connection after the handshake is complete.
- At this point, either party can start sending data.
- A WebSocket transfers data as messages, each of which consists of one or more frames with the payload (the data you are sending in each frame).
5. Managing Connections and Messages of the System
Server side
- Handling multiple client connections
- Broadcasting messages to all connected clients

Client side
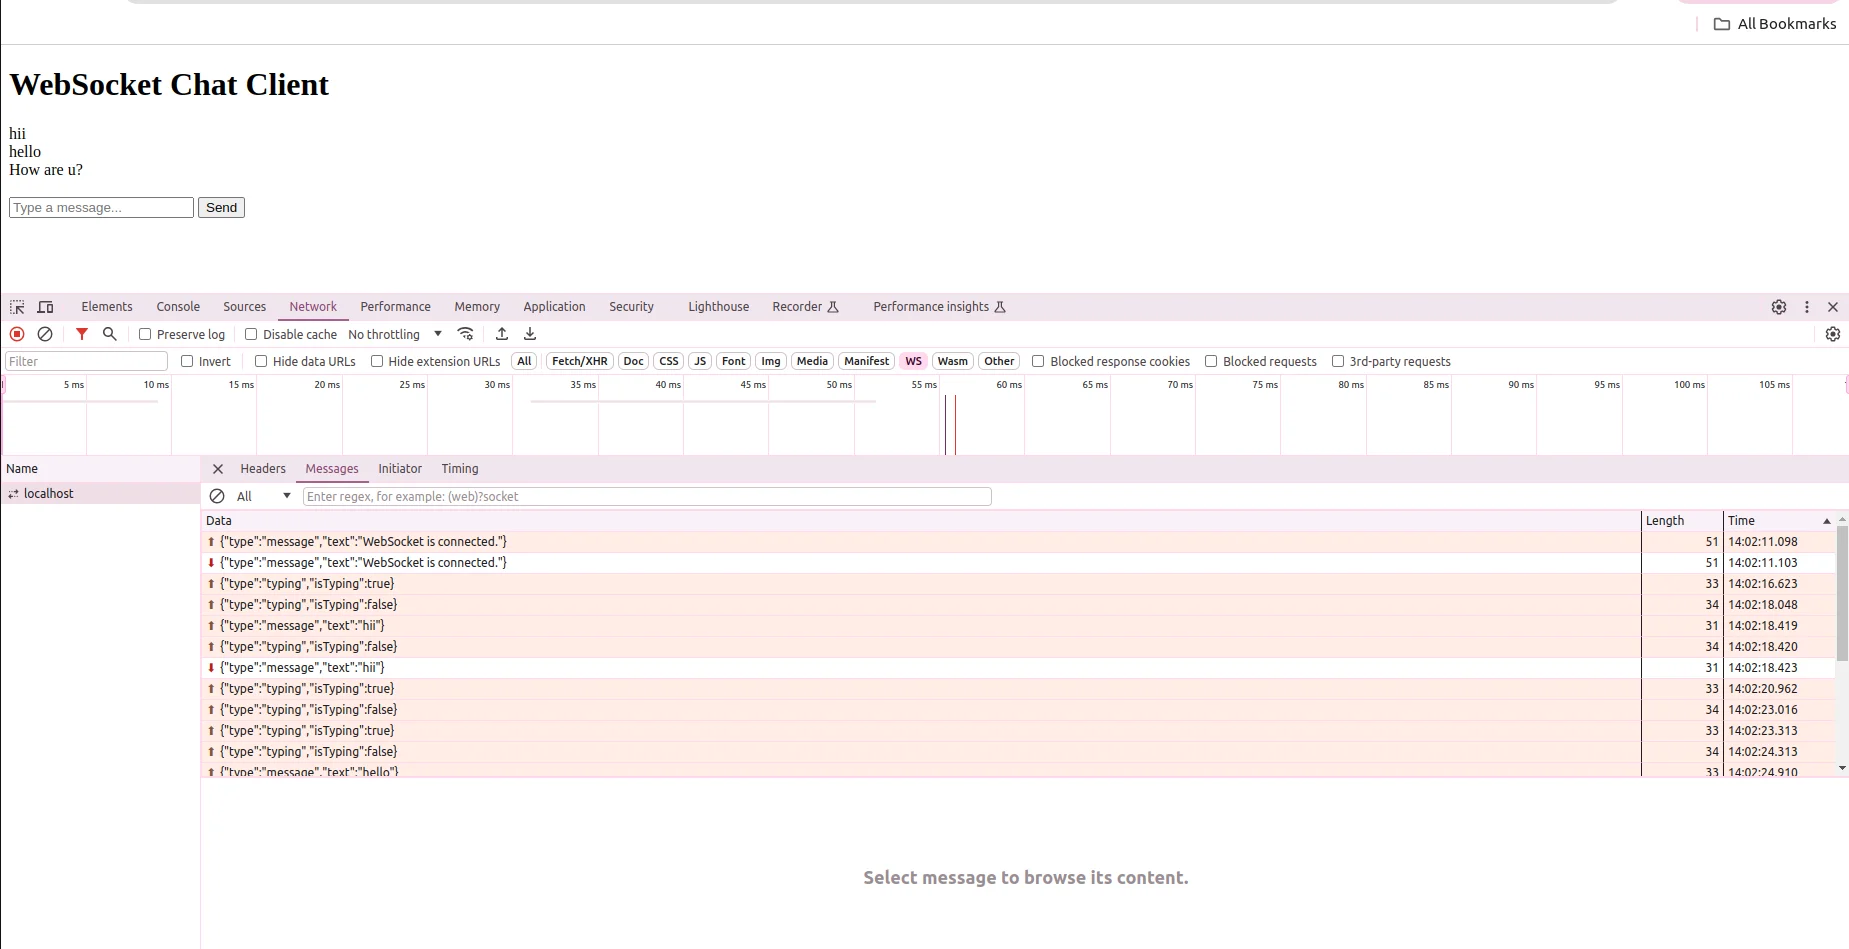
- When the WebSocket on the client side receives data, it triggers an onmessage event with a property called data, which can be used to access the message contents.

- Using the Network tab inside Chrome DevTools, you can see the messages in each frame in your websocket connection by exploring the data tab.
5. Implementing Error Handling and Debugging
Add comprehensive logging on both the server and client sides to trace the flow of messages and connections. Implement error handling to manage unexpected disconnects and other errors gracefully.

- The client can start the process of ending a WebSocket connection in using below code:

- In order to manage any cleanup after closing is complete, you may add an event listener to the close event as seen in the code below:

- In order to process the close event as needed, the server must listen for it:

6. Enhancing the User Experience
Ensure that the client application updates the chat interface in real-time as messages are received. Consider using frameworks or libraries if needed to enhance the UI/UX (e.g., React, Vue.js).
7. Conclusion
By following these steps, you will have created a functional real-time chat application using WebSocket. This application demonstrates the core concepts and practical implementation of WebSocket communication, providing a foundation for more complex real-time applications such as collaborative tools, live notifications, and online gaming. Furthermore, you can Implement additional features like private messaging, typing indicators, and message history as the feature enhancements.